The Cycles Shader Encyclopedia
Find Cycles Nodes a little confusing? You're not alone. Whilst Cycles Nodes offer almost you limitless control over a materials, many users struggle to understand it's labyrinth of options.
Which is why this post dares to do the impossible: explain every Cycles shader in easy to understand, plain English.
Enjoy! -Greg Zaal
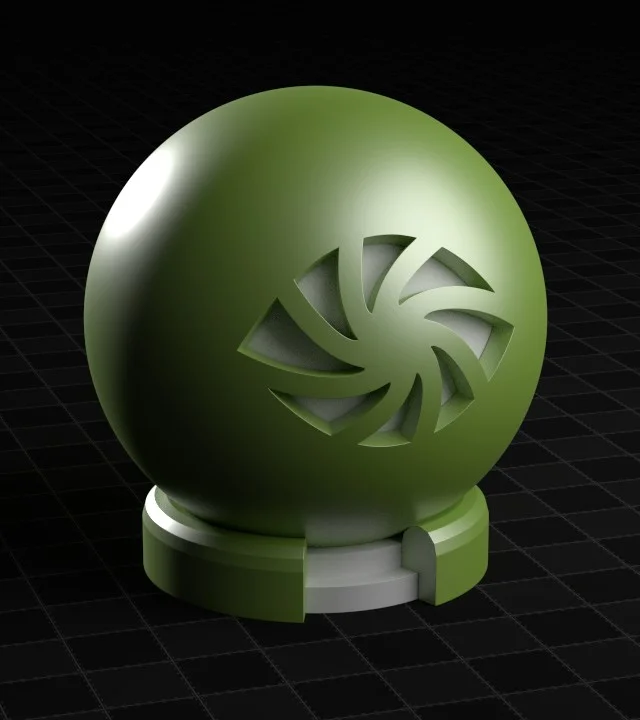
Diffuse BSDF
What it does: Receives light and diffuses it with zero visible reflections.
Use it for: Non-reflective surfaces like paper or walls. Or for mixing with other shaders.
Properties

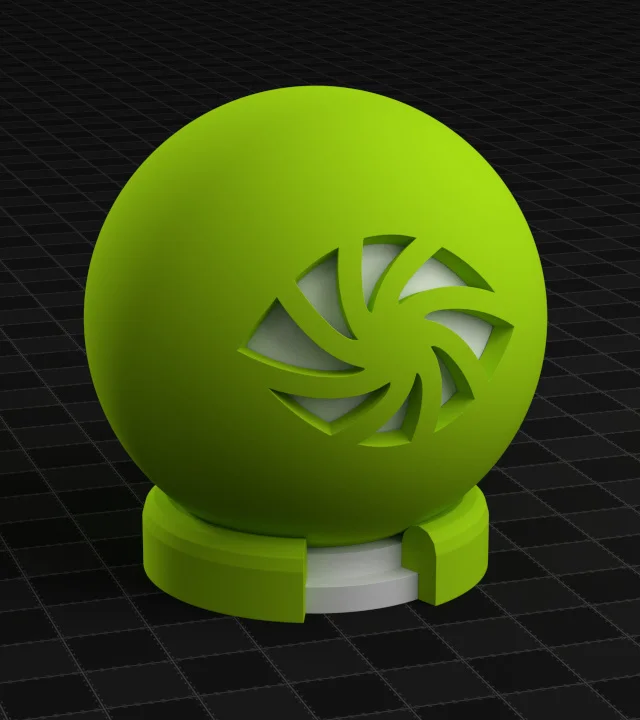
Roughness
You may have played with this obscure little slider and stared at your screen in confusion wondering why nothing is changing. Something IS actually changing, but it's very subtle:
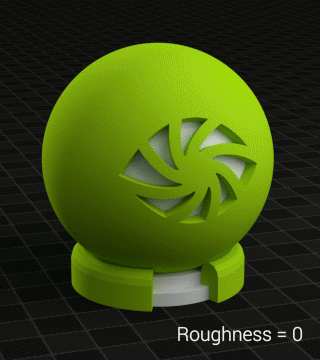
Roughness adds very subtle, microscopic levels of roughness to the surface.
Where would you use this? Anywhere where you need a very fine level of roughness that's barely visible to eye, like fabric, rough wood and sand:
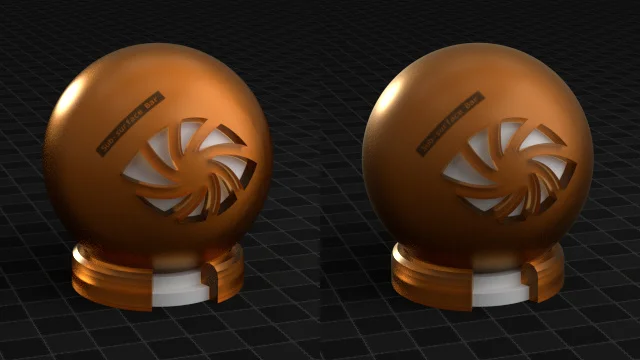
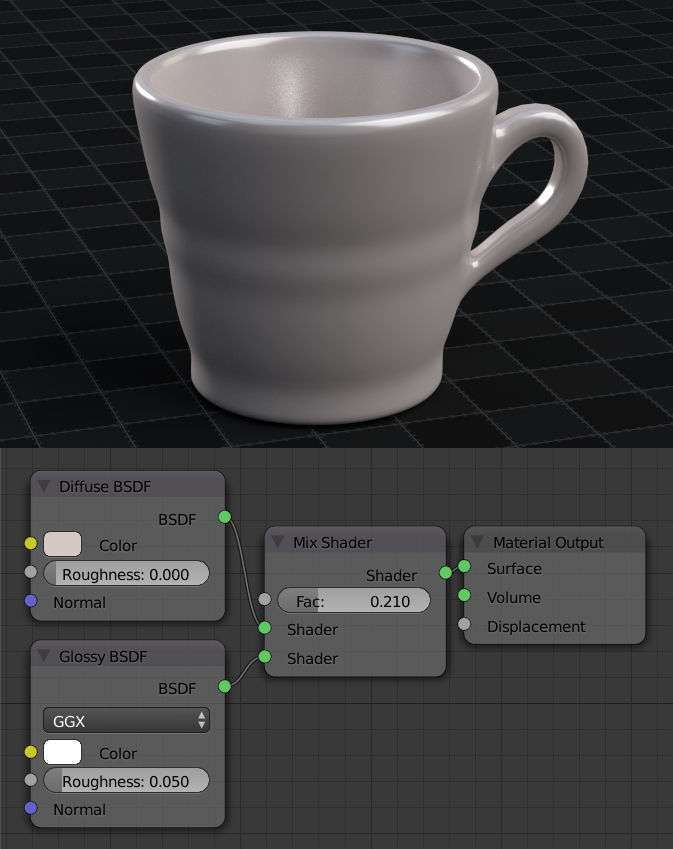
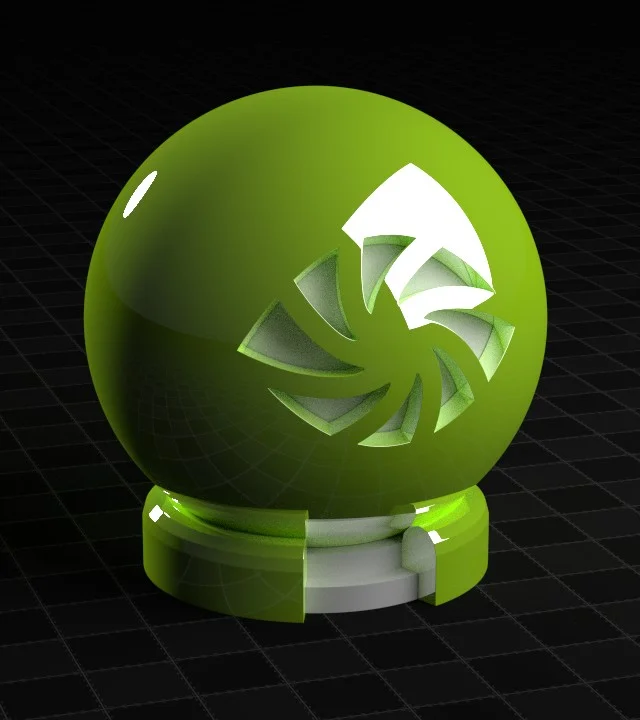
Glossy BSDF
What it does: Reflects lights and the environment
Use it for: Adding reflections to any object
This very common shader is commonly in combination with the diffuse shader (using the Mix Shader, discussed later) to create some very common materials like plastic, metals, ceramics and wood:
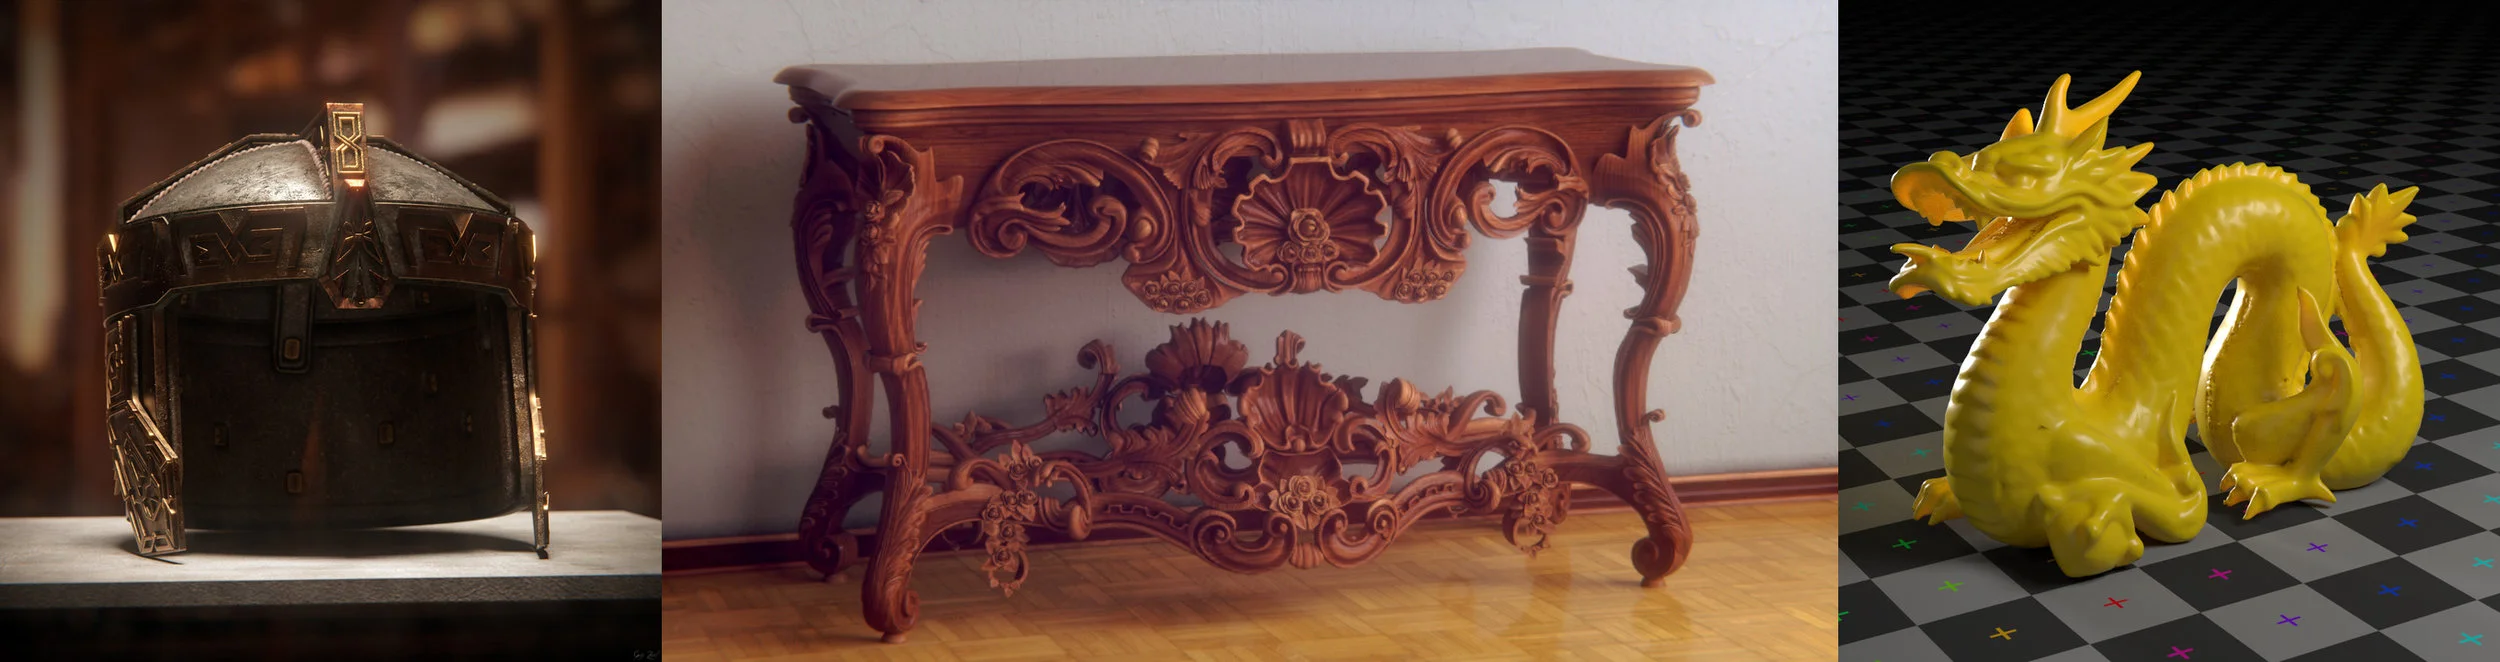
Table model by 1DInc, dragon by Stanford University
Properties

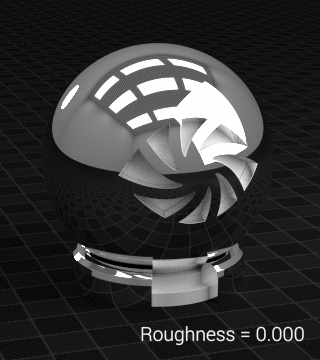
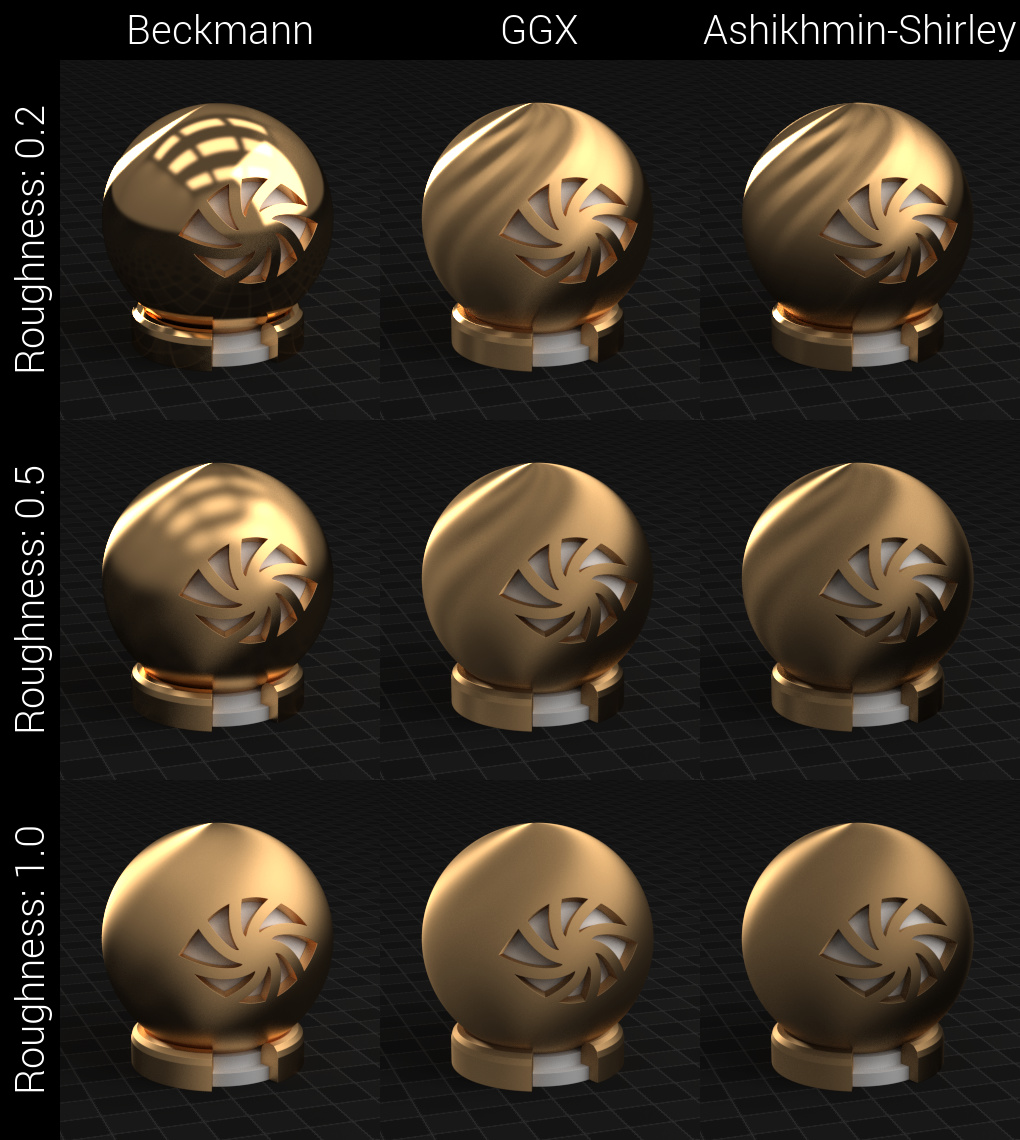
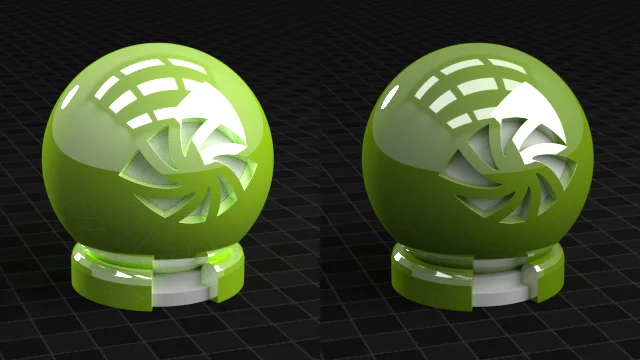
Distribution Function
Simply put, this is the math behind how the "blurriness" is calculated.
Which one should you use? Well it depends on the situation as well as your own preference.
I think Beckmann works well for metals and GGX is good for everything else. Ashikhmin-Shirley was added fairly recently, and seems to be a sort of middle-ground between the two. It's worth noting though that you'll see no change in their appearance from a Roughness: 0 value.

Roughness
This simply controls how blurry the reflections are by simulating microscopic bumps in the surface:
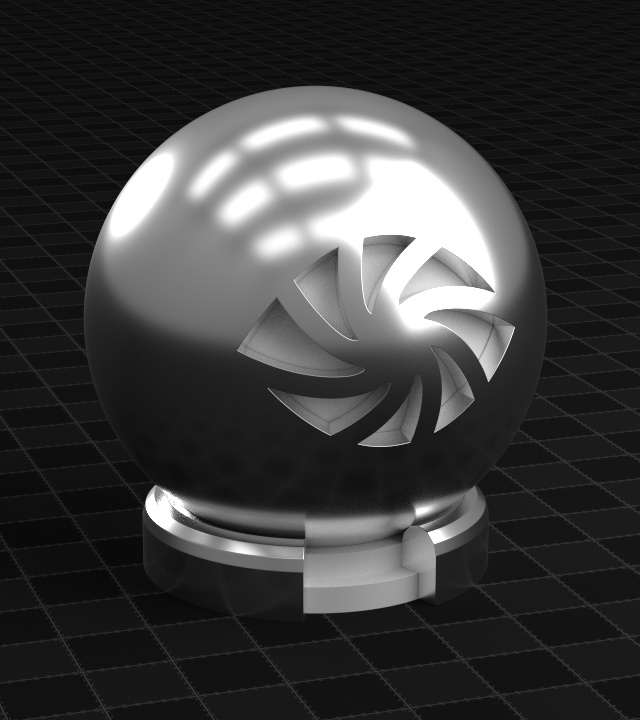
Anisotropic BSDF

What it does: Behaves exactly the same as the Glossy shader, but skews the reflection in one direction.
Use it for: Brushed metal or materials where the light shouldn't reflect evenly, like the back of a fry pan.

Properties
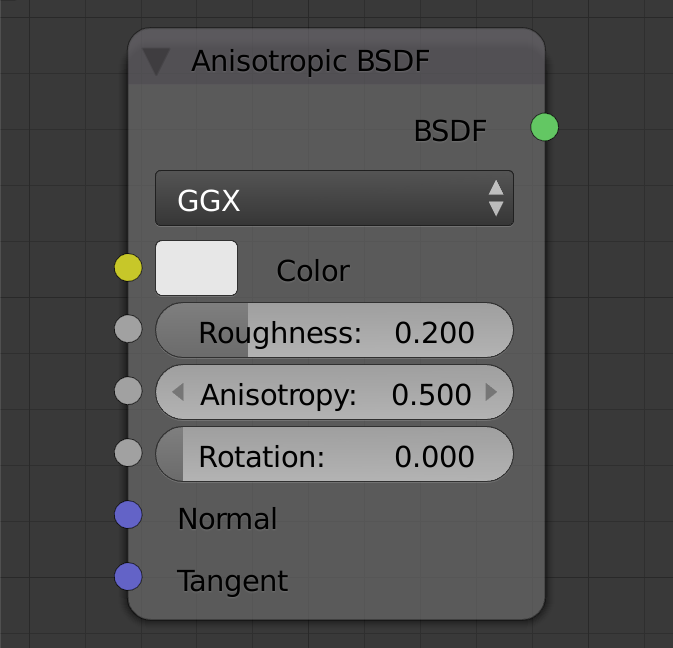
Distribution Function
These are the same as the Distribution Functions for the Glossy shader, although the difference between them is slightly more noticeable:
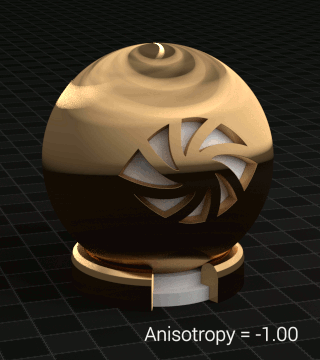
Anisotropy
A value from -1.0 to 1.0 that controls the amount of stretching. Negative values stretch the reflections horizontally, and positive ones stretch them vertically. On 0.0, it is exactly the same as if you'd just used a Glossy shader.
Rotation
Used to rotate the direction of the skewed reflections. Goes from 0.0 to 1.0 and rotates from 0 to 360 degrees. Usually you'll want to keep this between 0.0 and 0.5 (180 degree rotation, looks the same)

Tangent
Basically, the Tangent controls what axis is used to skew the reflections. Use the Tangent node to choose which direction to use.
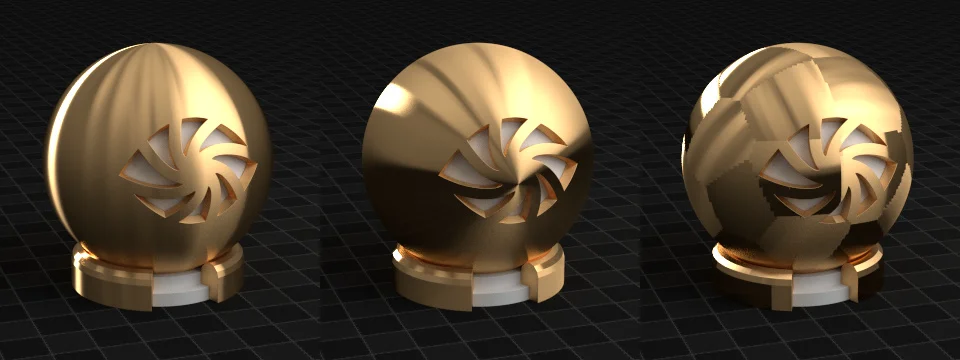
Anisotropy with tangents: radial Z, radial Y, UV
Watch the tutorial: Introduction to Anisotropic Shading
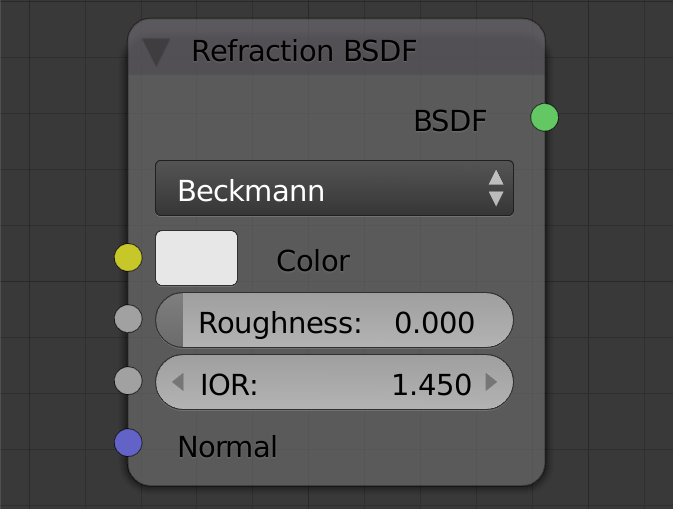
Glass BSDF
What it does: Behaves like real glass, bending and reflecting light as it hits the surface according to the IOR (Index of Refraction).
Use it for: Glass, water or any other reflective, light bending materials like gemstones.
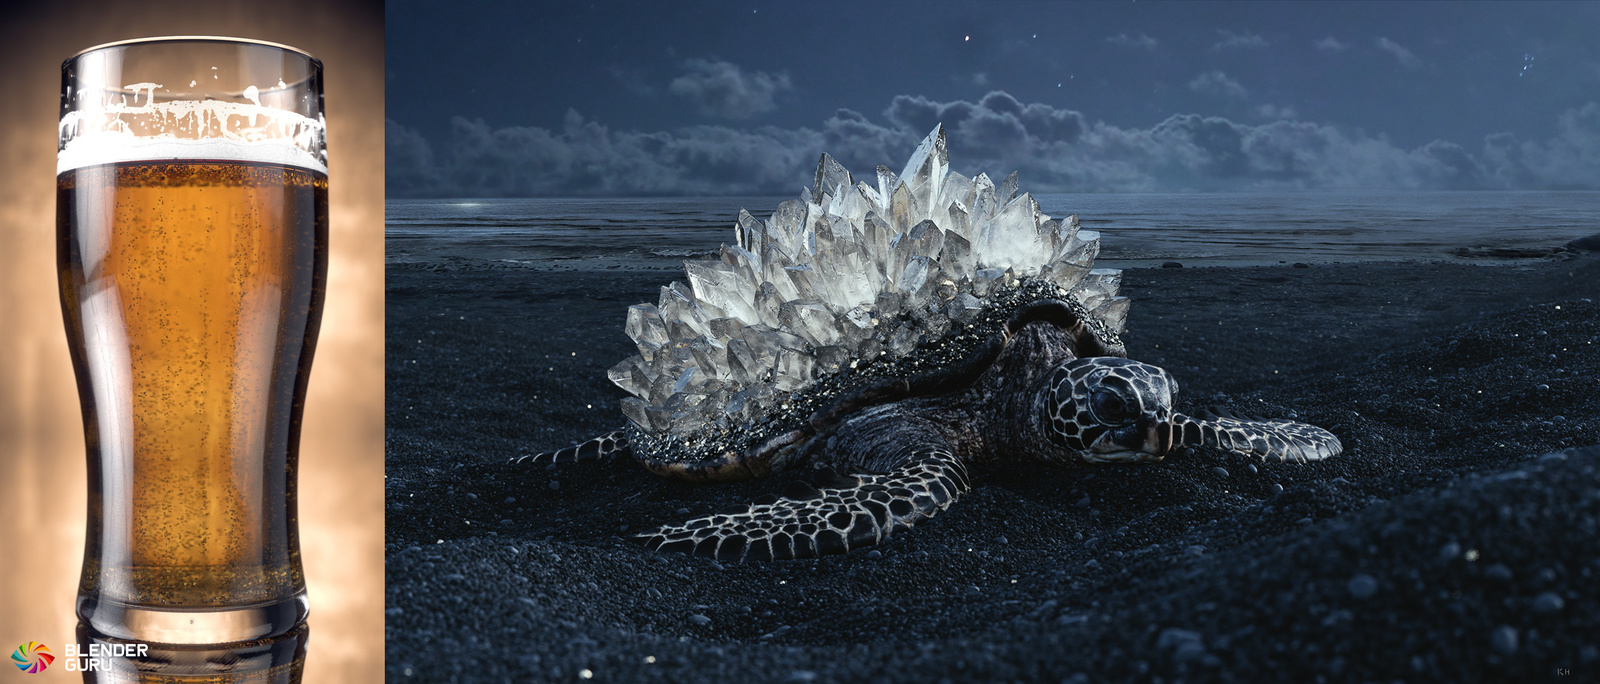
How To Make A Beer tutorial & Crystal Turtle by Jeepster
Properties

Distribution Function
Again, these functions just control which algorithm is used to calculate the appearance of rough reflections and refractions, although this time the Ashikhmin-Shirley option is not available.
Beckmann vs GGX
Roughness
Simulates tiny bumps and scratches on the surface, which can create the appearance of frosted/sand-blasted glass.

Glass Roughness: 0 vs 0.2
IOR
The Index of Refraction controls by how much the light is bent as it passes through this surface, as well as how visible the reflections are.

What it does: Behaves exactly the same way as the Glass shader, except without the reflection component.
Use it for: Special cases where you need to refract light, but not reflect. Like heat distortion and black holes.
Credit to gandalf3 for his incredible Black Hole Tutorial.
Transparent BSDF

What it does: Completely transparent when white, tinted when colored.
Use it for: Combining with other materials to create transparent parts of the material.
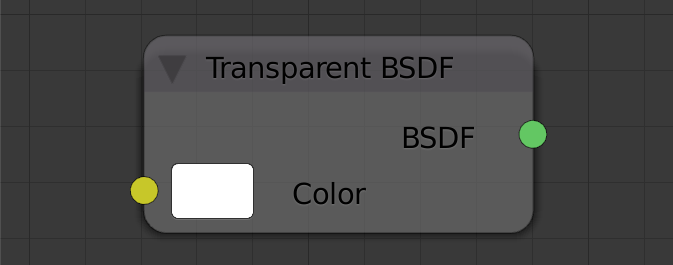
By itself it's invisible and fairly useless - but when combined with an alpha masked image, it can be used to give the appearance of complex objects like leaves or hair.

Glass with no refraction, Sponza Atrium by Marko Dabrovic (download the blend)
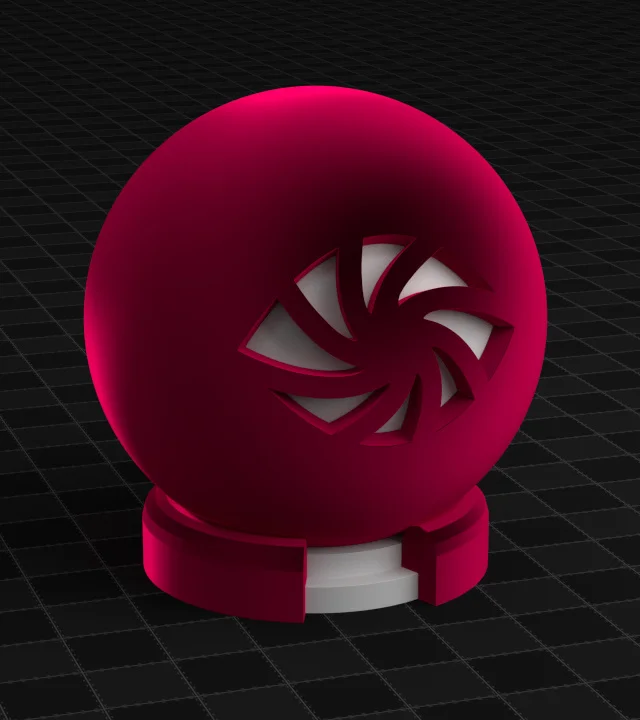
Translucent BSDF
What it does: Let's light pass through it.
Use it for: Thin objects like grass or paper. Combine with other shaders like diffuse, for a more realistic effect.

This one confused me for a really long time, but that was until I realized it's not meant to be used on its own, it's meant to be combined with other shaders to allow light to pass through them.
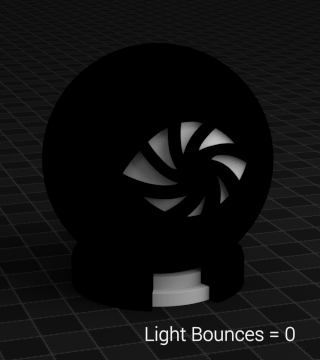
Notice how the plane lights up only when the light is pointing at it from behind? That's how the translucent shader behaves by itself.
What's really important here is the number of light bounces. Once the light gets inside the mesh, and we allow it to bounce around inside, some of that light will then come back out through the surface and light up the front faces:
This isn't particularly helpful on its own, but if we combine it with say the diffuse shader, we can create some really interesting materials.
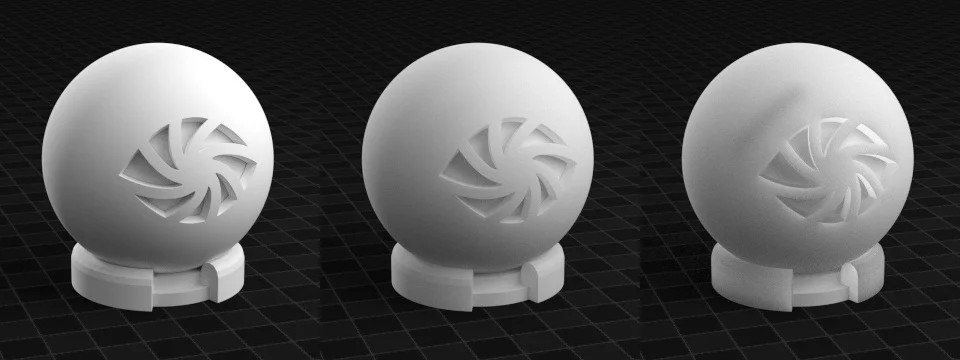
Diffuse only, diffuse and translucent mixed, translucent only
This isn't to be confused with the Sub-Surface Scatting shader (discussed later).
Use the translucent shader only when the material is thin (paper, grass, leaves etc.).
Velvet BSDF
What it does: Bends light around it like real velvet fabric. Use for clothing and fabric.
Use it for: Clothing and Fabric.
You can think of it like a Diffuse shader, but with a big dark spot in the middle:
Diffuse vs Velvet
Properties

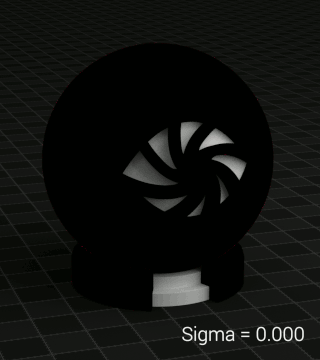
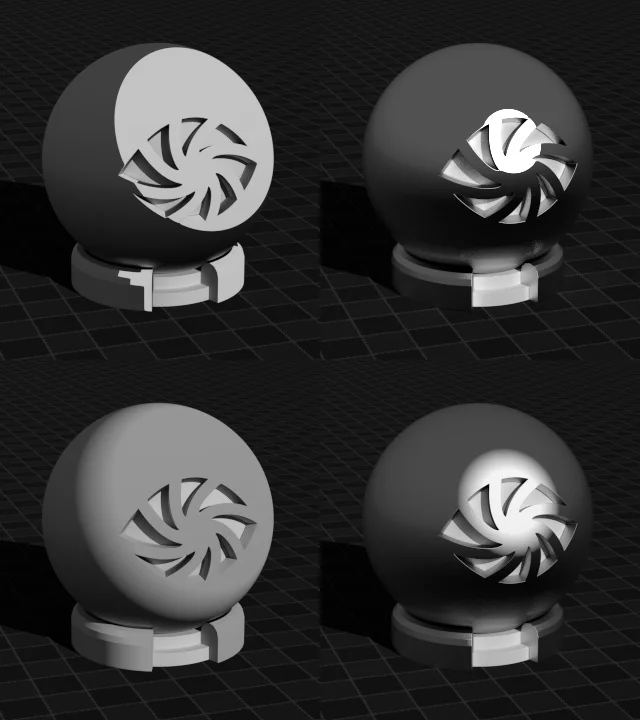
Sigma
A sort of roughness value that controls the size of the dark spot, where higher values means the dark spot is smaller
Toon BSDF

What it does: Create cartoon-like shading.
Use for: Special circumstances where you need a non-photorealistic cartoony style look.
Properties

Component
Choose between Diffuse and Glossy - the difference is simply that diffuse is a view-independent component (the appearance of a particular point on the surface doesn't change when the camera moves around), and the glossy is view-dependent.

Toon components (diffuse vs glossy)
Size
Choose the size of the circle shapes - usually a large size is used for Diffuse, and a smaller one for Glossy.
left: diffuse with small and large size; right: glossy with small and large size
Smooth
When using the Glossy component, this is like a roughness control and blurs reflections. For the diffuse component, this softens/blurs the circle shapes.
left: diffuse with small and large smooth; right: glossy with small and large smooth
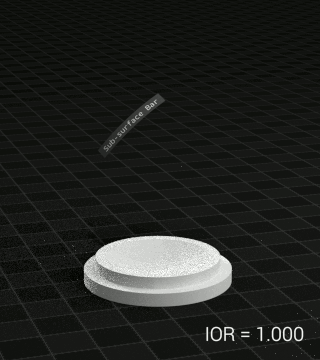
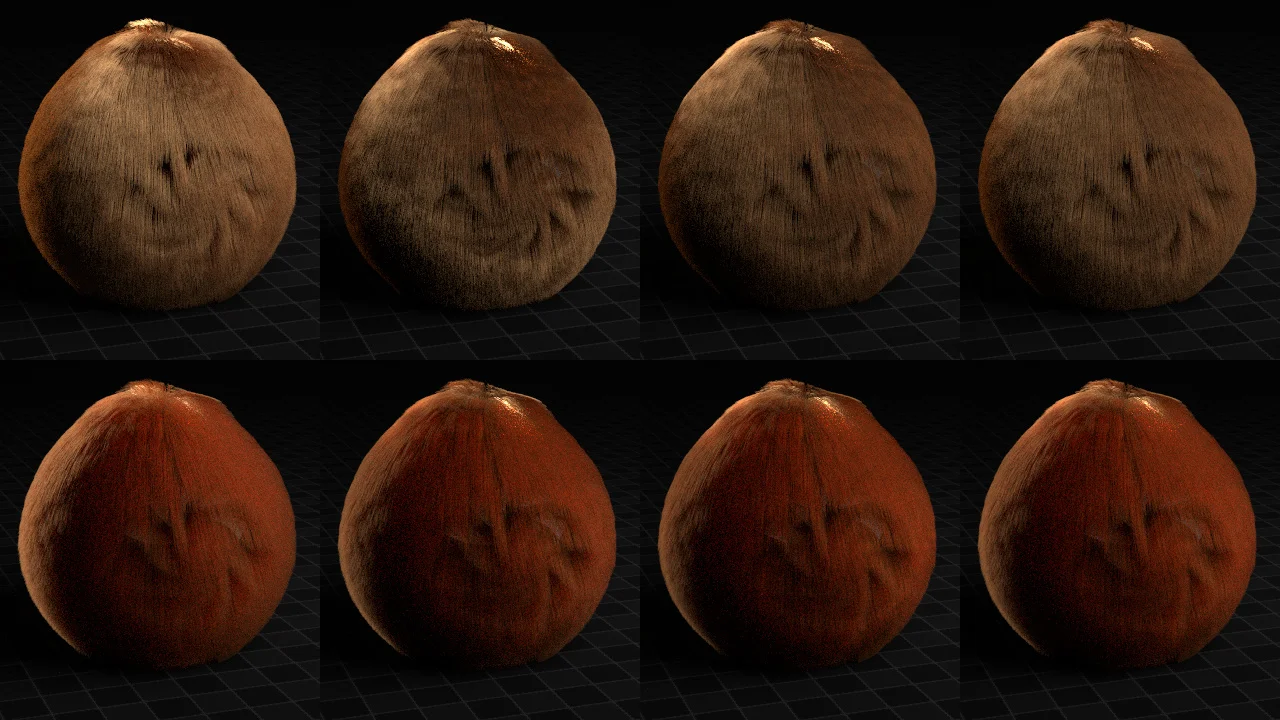
Subsurface Scattering
What it does: Simulates the scattering of light beneath the surface of an object.
Use it for: Skin, wax, milk and many kinds of food.
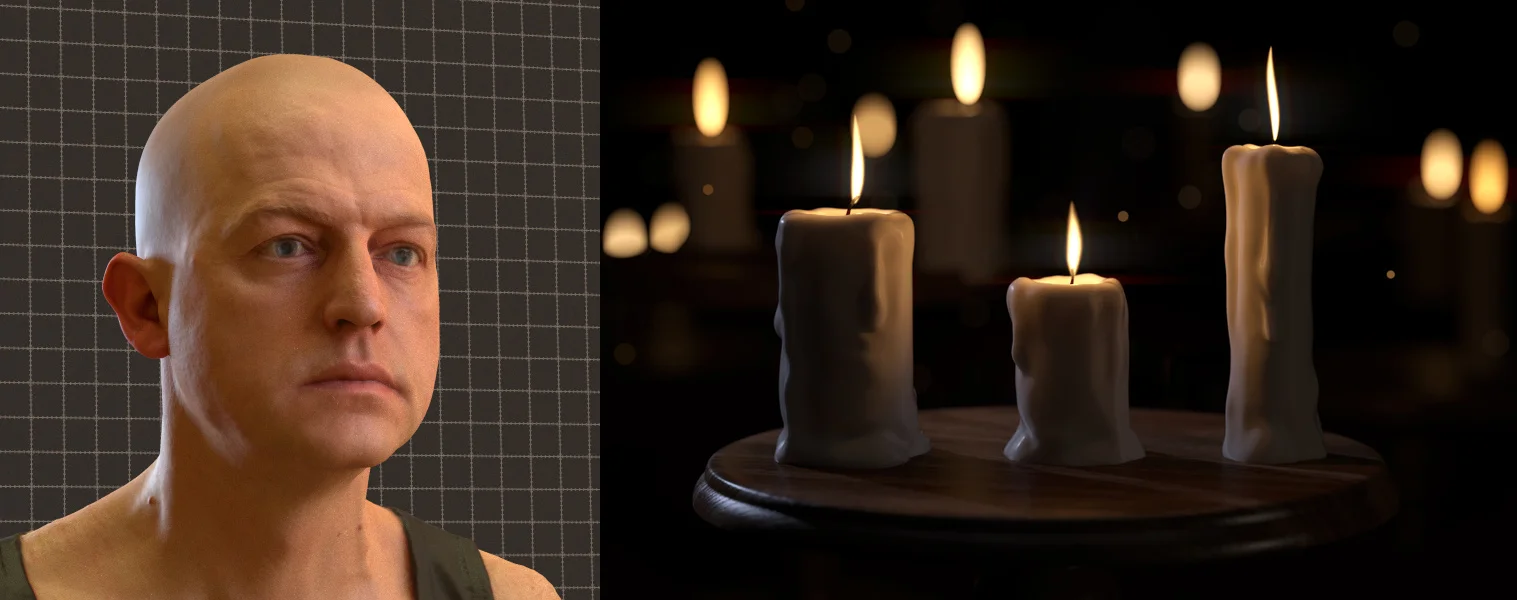
Head scan by Ten 24
Properties
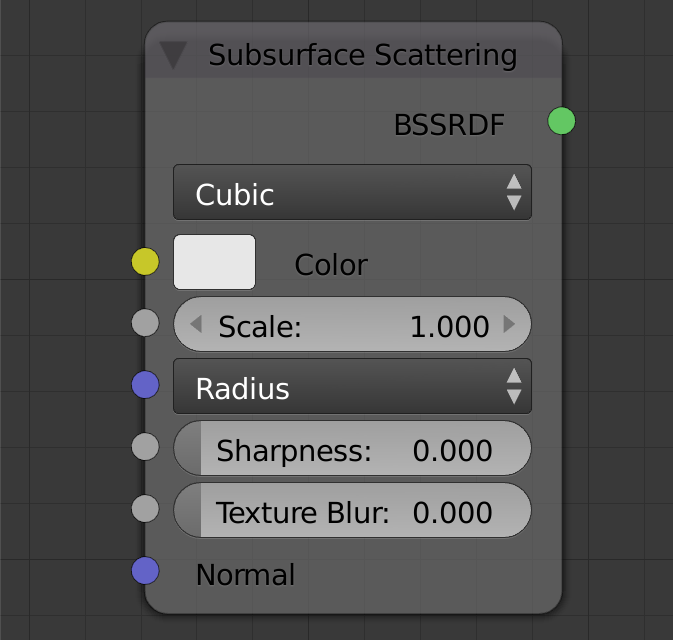
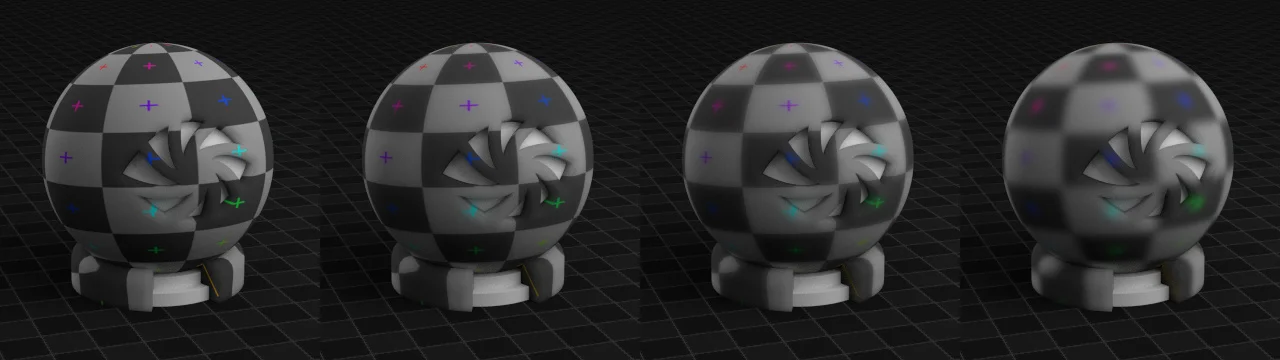
Falloff
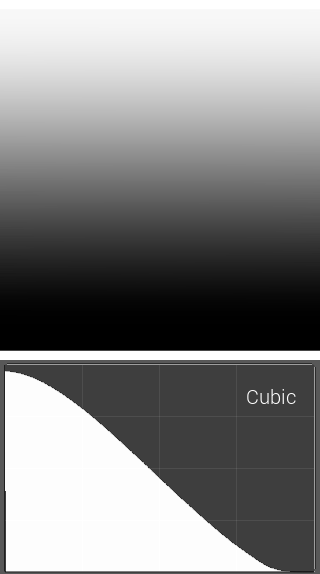
Similar to the glossy's distribution function, this simply controls which algorithm is used to calculate the gradual falloff of light as it travels through the material. There is very little difference between the two options (Cubic and Gaussian), however measured data is usually fitted to the Gaussian function (see: NVidia, Arnold, Matt Heimlich), and Cubic gives us an additional "Sharpness" option.
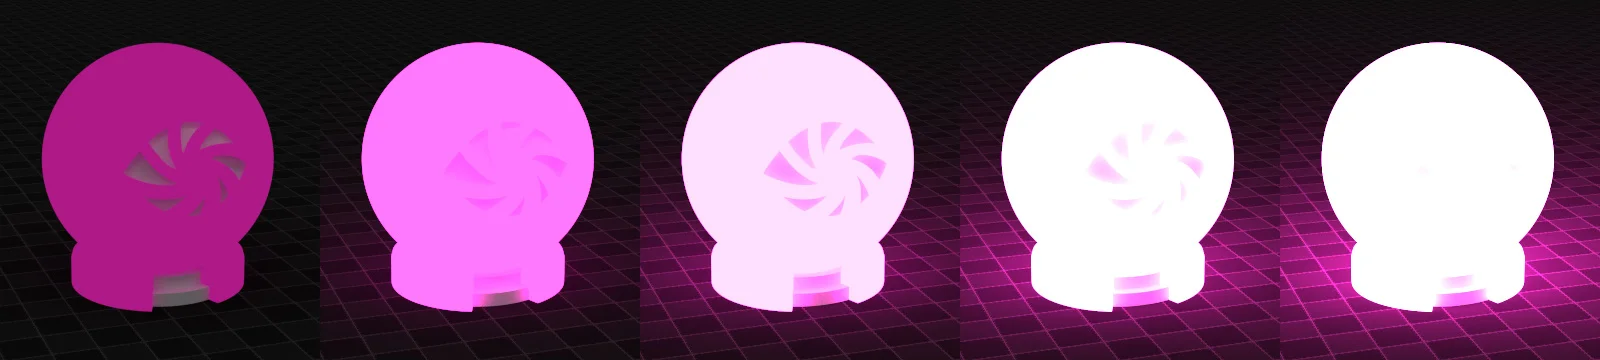
Scale
Controls how far light can scatter through the surface.
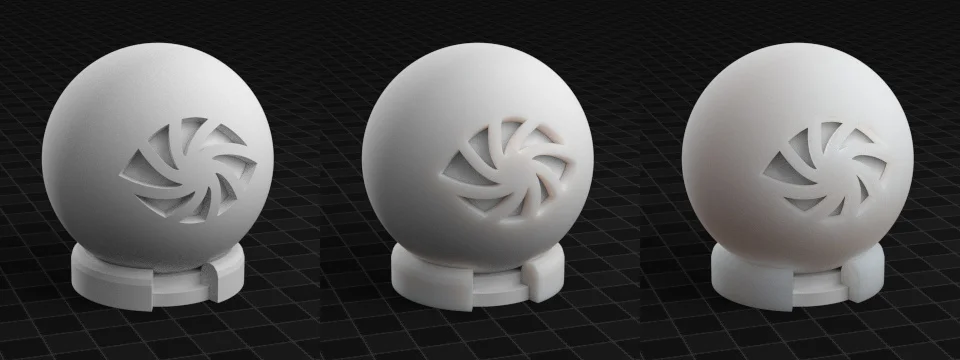
Radius
An additional way to control how far light scatters though the surface, only this time with separate values for the red, green and blue channels. This means we can tint the scattered light a certain colour, like how skin scatters more red light. Note that you can actually plug a color into this socket.
On the right, the radius is larger for red
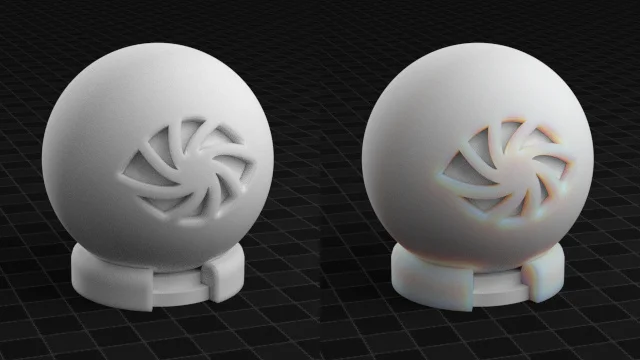
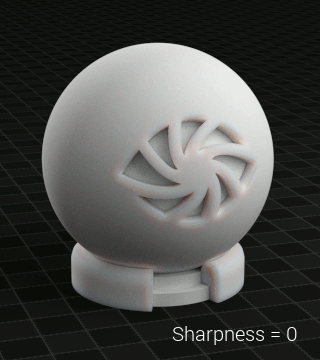
Sharpness
This option is only available when using the Cubic Falloff. It makes sure sharp edges aren't softened too much, and can help reduce the appearance of dark edges.
Texture Blur
Obviously this is used to blur the texture (whatever is plugged into the Colour input), but it's probably not exactly what you're expecting. The radius of the blur stays constant, and is the same as the Scale input. What the Texture Blur slider controls is how much of the blur is mixed in with the original texture, so on 0.0 you have your ordinary crisp clean texture, and on 0.5 you have half of your clean texture, and half of the blurred version fading in on top. On 1.0, you can only see the blurred texture.
This means that it'll look like some of the texture's color is bleeding into the surface below. You probably won't need to use this a lot though, since skin textures are usually made from photos, and thus already include the blur effect.
Emission

What it does: Literally emits light and casts it onto surrounding objects.
Use it for: Objects that need to cast light or appear bright, like light bulbs, sparks, fire or even just as a light source out of shot.
Properties

Strength
The intensity/brightness of the light emitted.
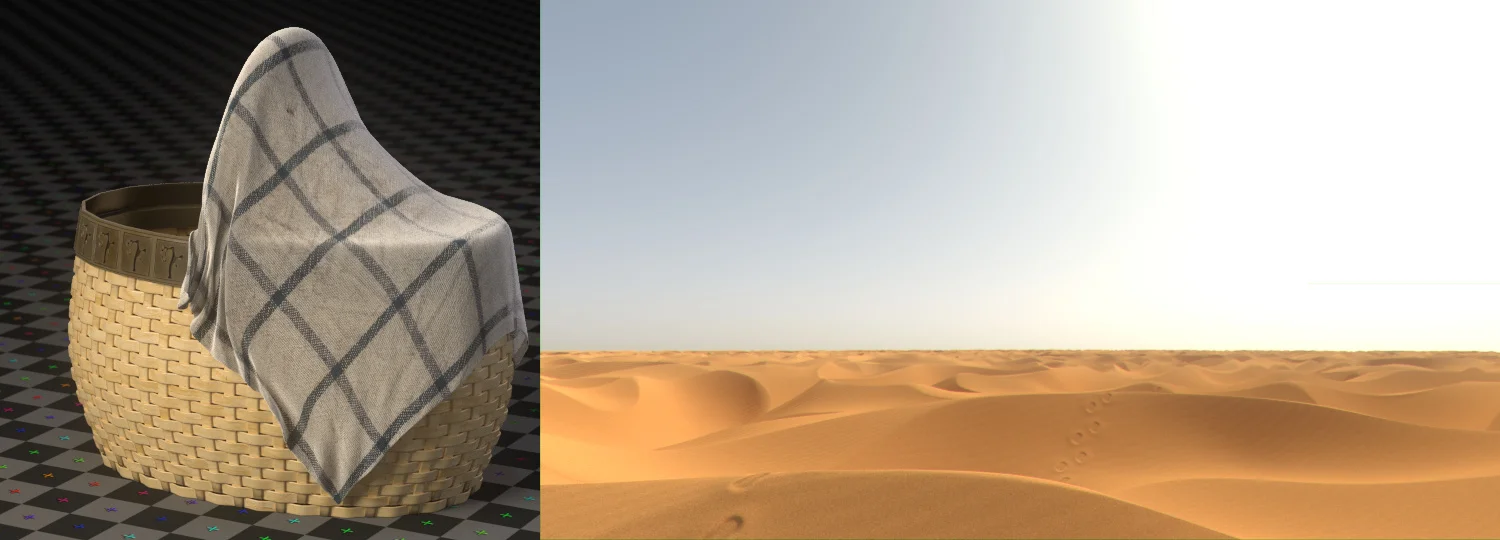
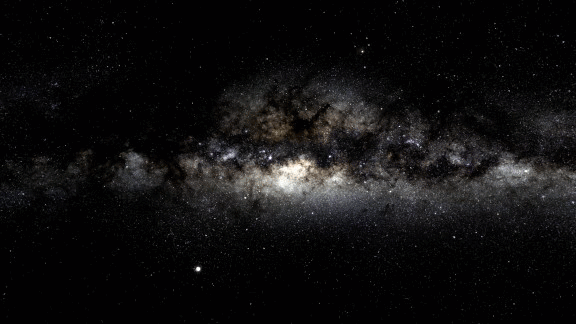
Background
The same scene lit only by various HDRs

This shader is only available in the World nodes, and is used to emit light from the environment.
You can use it to add a sky texture for those bright and clear sunny days, or an HDR image for some instant fancy lighting.
Here's a tutorial on how to use HDRs for lighting in Cycles.
Hair BSDF
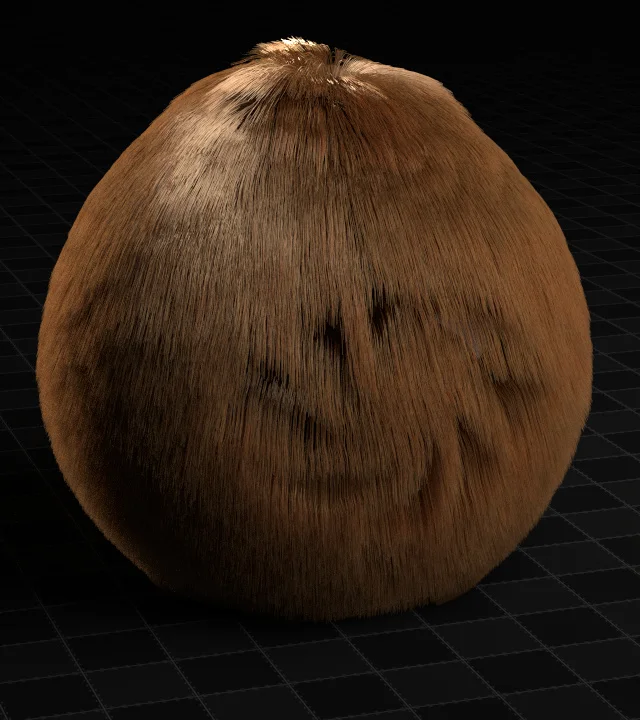
What it does: Absorbs and reflects light - but specifically for hair.
Use it for: Hair and fur.
This interesting shader is like a mix of the diffuse, translucent and anisotropic shader.
Generally hair is a headache in CG. Not only is it hard to create and groom in an attractive way, but it's extremely taxing on rendering, both in simulation and rendering. That's because hair is basically an enormous amount of tiny geometry which has to look right as a whole.
So this shader takes advantage of the fact that we don't care what each strand looks like, we only want our awesome fluffy character to look good. Yes, you could create a pretty good material for hair using diffuse, glossy and translucency or SSS, but that would take a really long time to render. So instead, this shader takes a shortcut and does some very clever approximations of what each strand looks like from afar. The strands are pretty terrible if you look at them up-close, and don't even think about using it on normal geometry (ok, do, it's pretty cool), but when used on actual hair, it works really well.
Properties
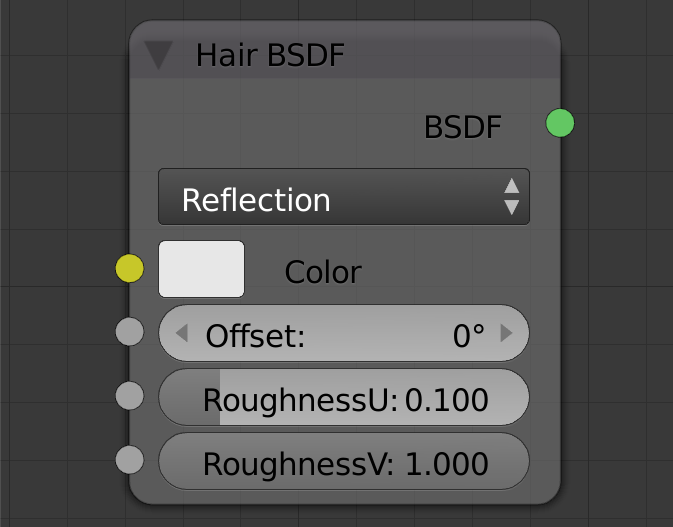
Component
The Reflection component is the light that bounces off the surface of the hair. Transmission is the light that passes through the hair and comes out the other side. Most of the time you'll want to use two nodes, one using Reflection and the other Transmission, and mix them together.
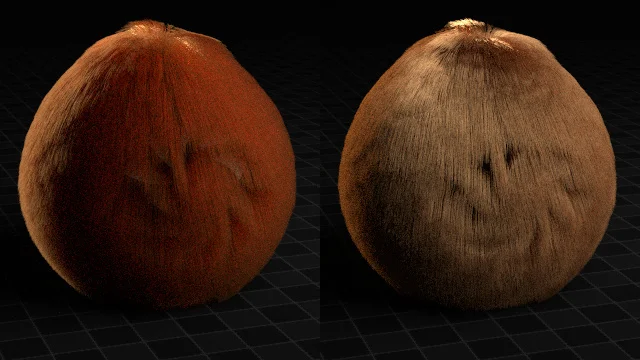
Hair components (transmission vs reflection)
Offset
Remember the Rotation property of the Anisotropic Shader? This is exactly that, but with a different name and it's measured in degrees. UI inconsistency bites :)
Hair, by nature, is a directional thing. And thus the reflection/transmission of light will be skewed in one direction. The Offset property just allows us to control the rotation of that skew direction.
top: reflection with increasing offset; bottom: transmission with increasing offset
Roughness U/V
Another inconsistency with the Anisotropic Shader - these two properties control the roughness in the direction light is skewed, and perpendicular to it. Swapping the values around would have the same effect as setting the Offset to 90 degrees. But of course this also allows us to make our hair more or less shiny, and control the strength of the anisotropy effect.
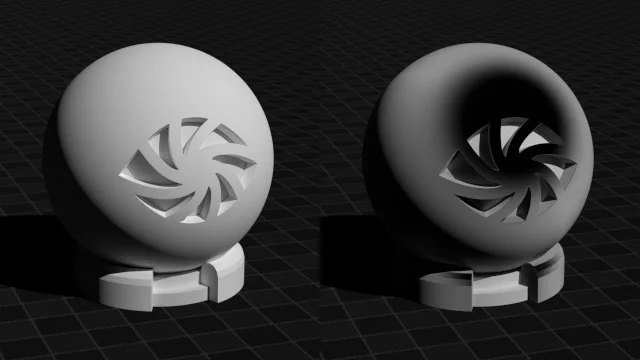
Ambient Occlusion

What it does: Calculates dark shading on corners and crevices.
Use it for: Emphasizing points of contact, or faking environment lighting.
AO stands for Ambient Occlusion, and is normally used for entire scenes using the AO render pass. But if you ever want more control, or add it only one object then this shader can come in handy.
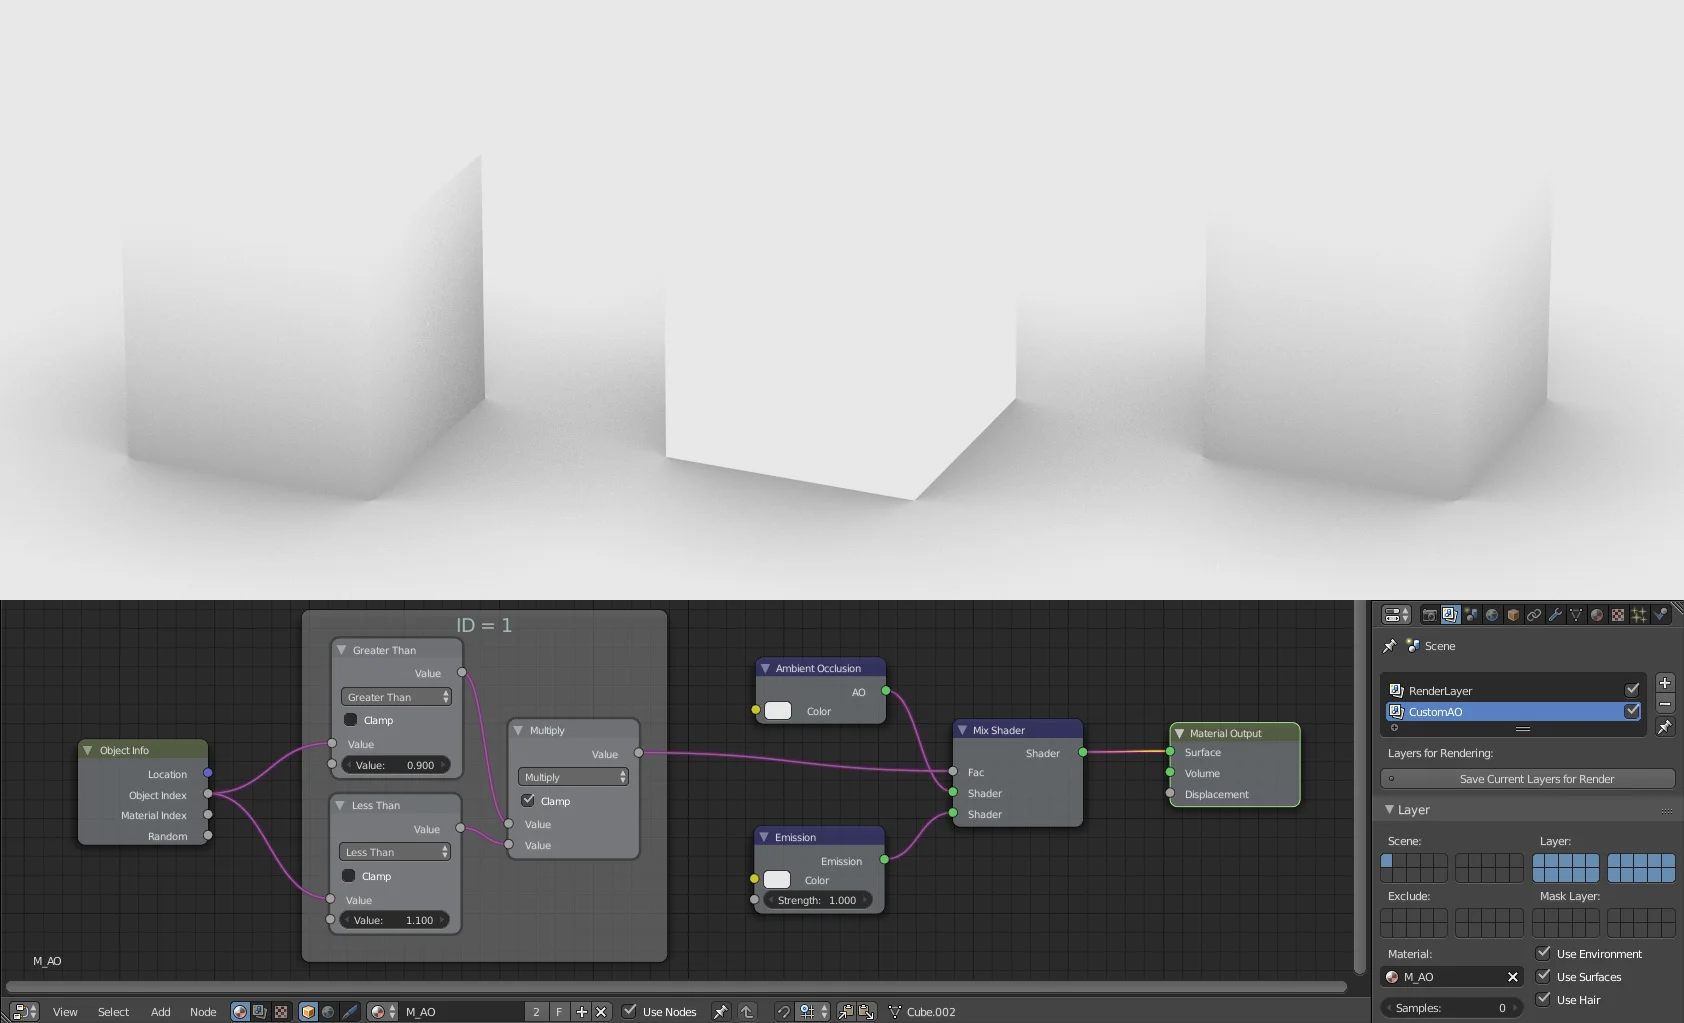
Using the method mentioned above to remove the AO on a particular object
This shader actually emits light by the way, so beware of using it outside of the custom render pass use-case.
The distance of the AO is controlled by the same setting for the World AO.
Properties

Color
This is the colour of the 'bright' part of the AO, the darkness is always black.

Holdout
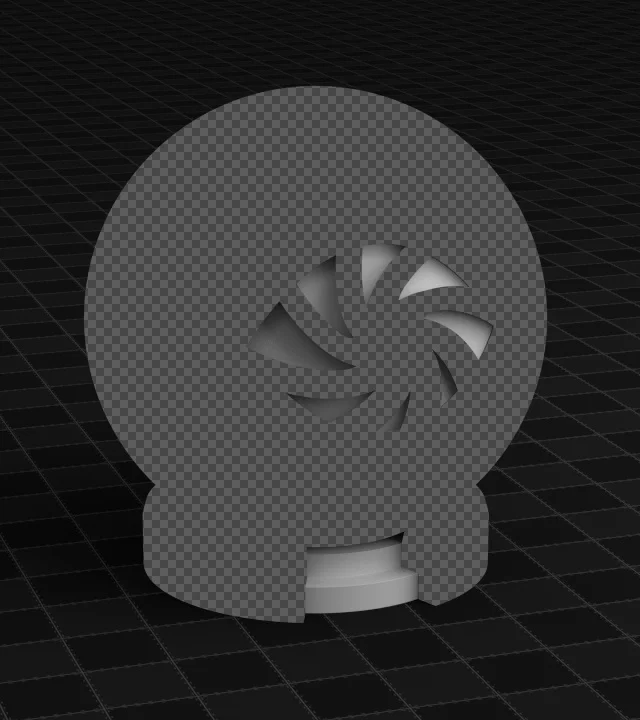
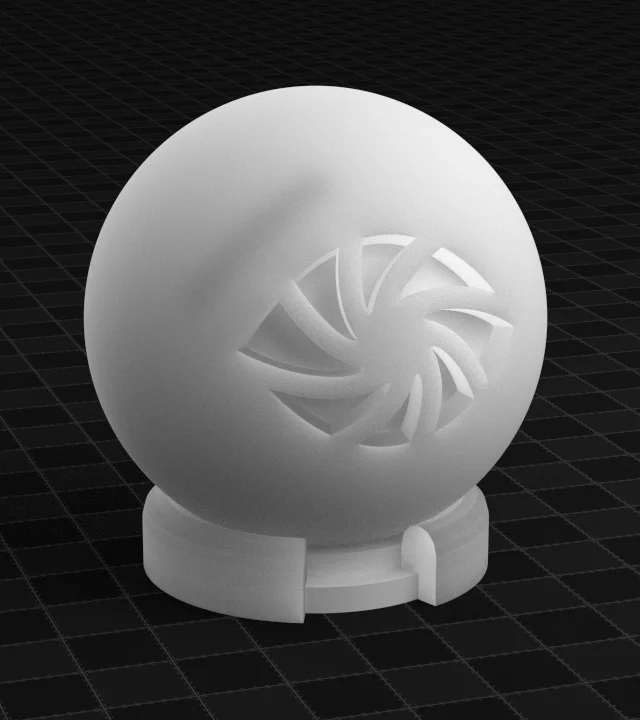
What it does: Punches a transparent hole in your render!
Use it for: Compositing purposes. Like making an object from a video cast a shadow, but block any CG objects behind it.
The object still casts shadows, but it'll make that part of your render transparent - assuming you have "Transparent" enabled in the Film panel.
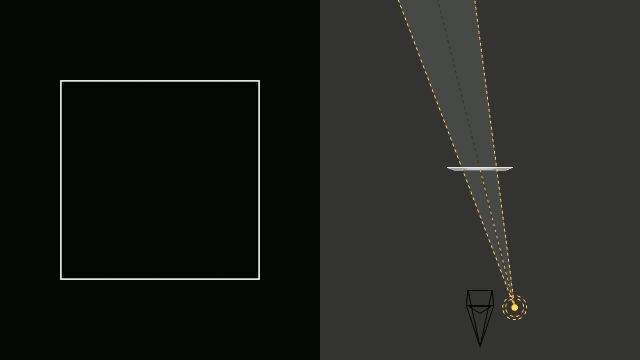
Volume Absorption

What it does: Affects the volume of the material, by gradually absorbing lighting, becoming darker the deeper the object is.
Use it for: Muddy water and coloured liquid or glass.
Unlike previous shaders, this doesn't affect the surface of a shader, it affects it's volume. And in this particular case it slowly absorbs light, the deeper it goes into the object.
Properties

Density
Controls how thick the volume is. The higher the density, the more light is absorbed, the darker and richer the colour.

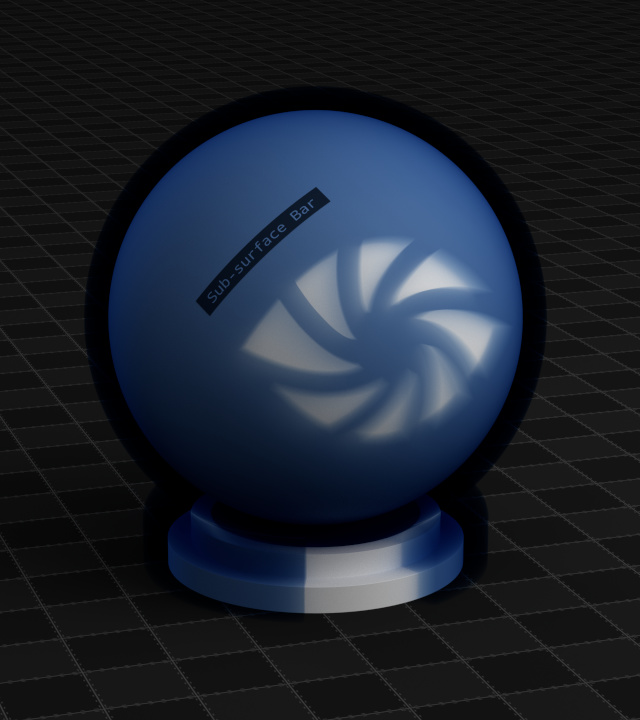
Volume Scatter

What it does: Scatters light that pass through the object.
Use it for: Clouds, smoke and mist.
Just like the previous shader, this effects the volume of the object not the surface - and in this case it scatters the light instead of absorbing it. Putting the Volumetric Scatter on your object is like turning it into a cloud: light passes through and around the object.
Be warned though, it'll instantly increase your render times :)

See it used: Make a Grassy Meadow Scene, How to Make Clouds with Cycles
Properties
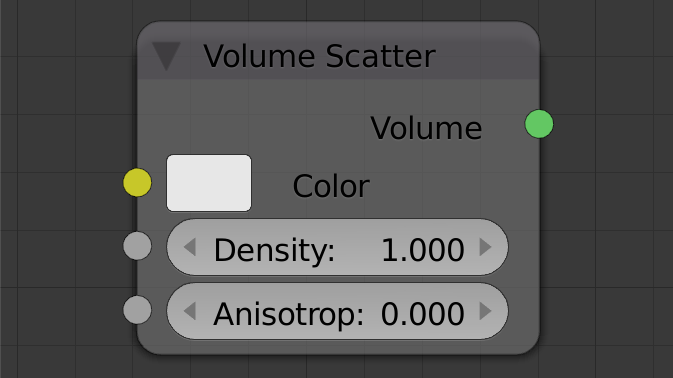
Density
This property controls how thick the volume appears. The higher this is, the less light will travel through it.
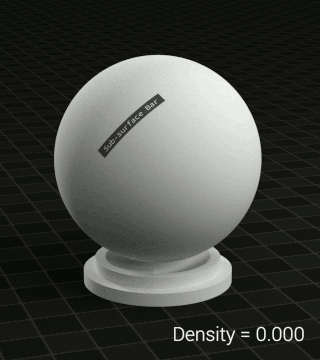
At it's highest value you can see that it almost looks like a diffuse shader. This is because the light is barely entering the volume due to how thick it is.
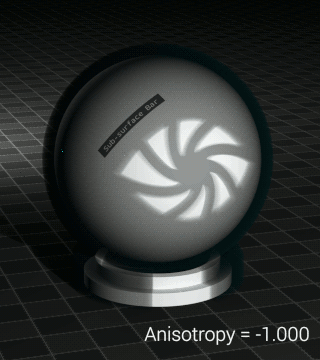
Anisotropy
This one can seem a little strange at first, but just remember that anisotropy is simply "the property of being directionally dependent" (Wikipedia). That means this property controls what the volume looks like based on the direction of the light and the camera.
Negative values give more of a bias to scattering light backwards, whilst positive values scatter more light forwards.
This means if the light and the camera are pointing in the same direction (like a camera flash), the volume will be more visible with a negative anisotropy value. If the light and camera are pointing in opposite directions (as if you were looking into the sun), the volume will be more visible with a positive value. This is a little easier to understand visually:
See the Blender Wiki for more.
Mix Shader
What it does: Combines two shaders together.
Use it for: Almost everything. It mixing the properties of two shaders together, which is important in the real world.
In the real world, almost no material in existence possesses the qualities of just one shader. It's a mix of different properties.
For example, a ceramic coffee mug has diffuse shading for sure, but it's also shiny, so there's a glossy shader in there too.
Your wooden desk could be broken down similarly - the wood itself is mostly diffuse, but also contains a rough glossy reflection of it's own.

Even a piece of thick glass isn't just reflective and transparent - it's also slightly foggy inside (volume absorption).

Add Shader
What it does: Combines shaders together + adds their lightness values together (effectively breaking the laws of physics).
Use it for: Special materials that need to combine two light values and aren't meant to be photorealistic.
In the real world, the amount of light that bounces off a surface cannot be greater than the amount of light that hit it in the first place. But the Add Shader will allow you to do that.
If we add a Diffuse and Glossy shader together, we would have double the amount of energy that we started with, which is physically impossible, but useful for some materials like if you wanted to combine red, green, and blue glass shaders to create a dispersion effect.
left: Add Shader combining Diffuse and Glossy (don’t do this, energy is not conserved); right: Mix Shader, physically correct (do this)
So if this Add Shader is so evil, why does it even exist? Well, it's not that evil, it's just a misunderstood villain :)
It can be used in some places, but only where you know that you're supposed to (or if you intentionally want to break the rules for artistic freedom).
Some places where you should use the Add Shader:
- To colour your Volume Scatter by adding a Volume Absorption of the same colour.
- For two shaders that are emitting light, like the Emission and Background Shaders.
- Where you know for sure that energy is being conserved - e.g. adding red, green and blue glass shaders to create dispersion.
Well that's it folks! I hope you have a clearer understanding of what Cycles Shaders do now.
Got a suggestion for how this post could be improved? Let us know in the comments below!
PS. Blender Guru is looking for new authors! Click here to apply.
PPS: If you're looking for a crazy in-depth book that covers absolutely everything to do with Cycles, check out BlenderDiplom's Cycles Encyclopedia.