
Making of: The Discovery
A couple of weeks ago, Mark Newnham won the Another Planet competition with his amazing render titled "The Discovery". We thought it would be interesting to give competition winners the opportunity to reveal their secrets in a "making of" post.
Mark agreed! So here he is explaining how it was done...

Hello everyone, my name is Mark Newnham and I’ve been using Blender for a little over 2 years now.
I’m 18 years old living in Melbourne, Australia, and currently studying Industrial Design at university.
I started using Blender by following video tutorials, mostly by Andrew Price.
Inspiration
The idea for this project essentially came from my fascination with the Rosetta Stone, an ancient Egyptian tablet of inscriptions in 3 languages. I thought it would be interesting to imagine what an alien version of this tablet would look like.
I eventually came up with the idea of having a human explorer discover the remnants of an ancient civilization that had long since vanished or become extinct.
Landscape
Initially I knew I wanted to make the landscape look as rough and inhospitable as possible. I began watching tutorials to see if I could learn some handy tips for making a detailed landscape. From that I realized that using multiple displacement modifiers would give me more control than using the landscape add-on tool.

Subdivide to add detail

Left hills

Right hills

Surface detail
In the end I was able to create a layered and detailed landscape that I could play around with to suit my scene.
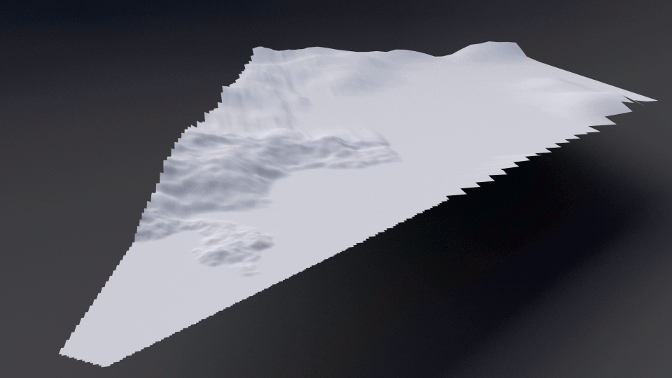
The plane is subdivided more the closer it is to the camera and less further away:

For the material I simply created a diffuse and glossy shader with a strong bump map.
To finish I added a simple ppost system with low-poly rocks to give it an even more detailed look.
Pillar
The material turned out to be rather complex, and took a lot of experimentation to perfect. Basically it is a diffuse and glossy shader with added dust, as well as ancient writing and artwork in selected areas.


Nodes for pillar material (click for full res)
To give the pillar its shape I used a displacement modifier. For the texture I used the same texture as the landscape, but restricted it to the Z direction to give it a decayed look.

Astronaut
The astronaut didn’t need to be too detail as it was a small and distant element to the scene. I came up with this quick model, to which I added a simple bump texture.

Compositing
The scene is made up of 3 layers: the landscape, the sky and the distant atmosphere. I also added a map value node for an extra atmospheric effect. The rest was simple color balance and lens distortion.

Compositing Nodes (click for full res)

This is the final result:

Find this helpful? Let us know in the comments below!